
Video/Image Cues
Video/Image Cues are available with SCS Standard and higher license levels. Video Capture is only available with SCS Professional and higher license levels.
Overview
Video/Image Cues are like 'slide shows' or 'story boards' - you can include several image and/or video files to be played sequentially. Although Video/Image Cues can handle multiple video/image files, you may alternatively just include a single file in a cue. Video/Image Cues also support live video feeds through a selected Video Capture Device.
Adding a new Video/Image Cue or Sub-Cue
On selecting the toolbar button or option to add a new Video/Image Cue or Sub-Cue, the action is as follows:
•If no Video Capture device has been specified in Production Properties then a File Selector window will be opened to enable you to select the files for the cue. Note that you can select multiple files in the File Selector window. If you select multiple files then you will be asked if you want to create a separate video/image cue for each selected file, or a single video/image cue containing all the selected files. The order of the selected files will probably be the order in which the files are displayed in the file selector, but unfortunately we cannot guarantee the order. If you wish, you can re-order the files (or cues) after you have created the cue(s).
•If a Video Capture device has been specified in Production Properties then SCS doesn't initially know if you want to select a file or a video capture device (eg a video camera). So the screen is displayed without a file having been selected. By default the first combo box in the detail panel will show Video/Image File, and to select a file you just need to click on the Browse (...) button to select the required file. To select a video capture device, click on the combo box and select Video Capture, and then select the required Video Capture Device.
|
Tip: If you do not yet have the video or image file you want to use for the cue then you can create a Place Holder for the Video/Image cue. To do this, simply select Cancel in the File Selector, and you will be asked if you want to create a Place Holder, so just click Yes. This will create an Video/Image Cue which can be 'played' just like any other video/image cue, but will, of course, immediately complete as there is no file selected and the duration of the cue is 0.000 seconds. When you are ready to assign a video or image file to this Place Holder cue, simply click the Browse (...) button to select the required file. (If you Cancel the File Selector and then click No when asked if you want to create a Place Holder, then the Add Video/Image Cue operation is also canceled.) |
Viewing or Changing a Video/Image Cue or Sub-Cue
To view or change a Video/Image Cue or Sub-Cue, just click on the relevant node in the Editor's Cue List.
When you have added or selected a Video/Image cue or sub-cue, a sub-cue panel like this will be displayed:
The above example shows how the panel appears when a video file is currently selected. The properties displayed to the right of the main image are slightly different for image files or for video capture devices.
There are four parts to the panel:
oGeneral and audio
oCurrently-selected file or video capture device
oTimeline adjustment controls and test controls
oTimeline
Properties and Controls
General
Description: Enter a description for this sub-cue. You can leave this field blank and let SCS create a default Description for you.
Rel. Start Time (Relative Start Time): These fields are available for every type of sub-cue. For details see Rel. Start Time under Audio File Cues.
Sub-Cue Fade In Time: Enter the time in seconds (eg 3.5) that you want the video/image cue to fade in with. Leave blank if no fade in of the cue is required. This fade in time is also used when resuming a hibernated video/image unless the SFR cue that activates the resume has a 'fade time override' set.
Fade Out Time: Enter the time in seconds (eg 3.5) that you want the video/image cue to fade out over when an SFR cue is activated to fade out this cue. The cue will be marked as 'completed' when the Fade-Out has ended, and any unplayed files in the cue will be discarded, unless the SFR cue specifies hibernate, in which case the playlist cue will be marked as 'hibernated' and any unplayed files in the cue will still be available when the cue is resumed.
Total Play Length: This display-only field shows the total time of the video/image cue, allowing for cross-fade time etc to avoid double-counting.
Repeat: Select this checkbox if you want the sub-cue to loop back to the start when it reaches the end. The sub-cue will keep on repeating until it is stopped, such as by an SFR Cue or by another Video/Image Cue that uses the same Screen. Note that with an SFR Cue you can cancel the Repeat, so that the cue will complete at the end of the current cycle.
Pause At End: Select this checkbox to pause the last item (which must be a video file for this property to be effected) when that video file ends. This will pause the final video on the last frame. To stop (and 'complete') the sub-cue you will need to use an SFR Cue. Note that currently it is not possible to fade out a video file while it is in the paused state. BTW, Repeat and Pause At End are mutually exclusive.
Screen: Click this button to show a pop-up dialog in which you can select the screen or screens on which this video/image cue is to be shown. For SCS Standard and SCS Professional licenses, SCS supports up to 4 secondary screens (numbered 2 to 5) provided they are configured as extensions of the Windows desktop. For SCS Professional Plus and higher licenses, SCS supports up to 8 secondary screens (numbered 2 to 9). When you set up your cues, select the screen or screens you ultimately want the video/image cue to be played to, even if one or more of those screens are not available on the computer you are using for designing your cues. If a required screen is not available then SCS will use the last available screen, and will adjust the size of the displayed videos and images to share that physical screen with the nominated screens. If no secondary screens are available then SCS will display the videos and images in panels across the top of the cue list in the main window. (See also Max. Screen No. in Display Options.)
|
Tip: If you have a stretched display spanning multiple devices, such as a Matrox DualHead2Go, see Options and Settings / Video Driver Settings for information on how to split the stretched display into independent displays. |
|
Important notes about using multiple screens per cue: •If you select more than one screen (eg you select screens 2, 3 and 4) then SCS always treats the lowest numbered selected screen (2 in this example) as the primary or 'master' screen for this cue, and the other selected screens (3 and 4 in this example) as slaves of the master. •Any image or video displayed on the master is reproduced on each of the slaves. •If you are displaying monitor screen panels on the main SCS window then only one monitor is shown for such a cue. However, the caption of that monitor window will identify the corresponding main display screens, eg '2,3,4'. •This feature is primarily designed for environments in which you have multiple screens that are to show the same video/image cues. SCS may not handle all the weird permutations of multiple cues trying to simultaneously use different mixes of selected screens. |
Audio
This section is only relevant for video files.
Audio Device: The audio devices available are as specified under Production Properties - Video Audio Devices. Although each Video/Image cue can only have one Audio Device selected, this property does allow you to send the audio output of different Video/Image cues to different devices. If you want to mute the audio, or if the video file(s) for this sub-cue have no audio, then select 'Mute Audio' as the device. This should be more efficient as the video playback library then will not play the audio track.
Trim: You should only need to use this control if you have files to be played at a low level and you are having difficulty setting the level using the Level control. With the Trim control you can apply an overall reduction in the level of up to 50dB.
Level: The level fader sets the level (volume) at which SCS will play the cue, after the fade in time if specified. The setting of the fader is also displayed and is enterable as a dB value. The maximum dB setting (loudest) setting is 0dB, which represents the level of the audio file as recorded, ie without any attenuation. If you set the level to -75 or lower then SCS treats this as -infinity, ie silent. You may also enter this as -INF.
Pan: The pan controller sets the stereo position of the sound. The setting of the controller is also displayed and is enterable as a number, where 0 is left, 500 is center, and 999 is right. The Center button is enabled if the current value is not 500 (center). Clicking this button sets pan to 500 (center).
|
Tip: If you want to make fine adjustments to the level or pan, left-click the slider and then use the left-arrow and right-arrow keys as required. When you left-click the slider the background color of the slider will change to your Windows color scheme's selected item color (probably blue). This indicates that the slider has focus so keyboard actions like left-arrow and right-arrow are processed by that slider. |
|
Tip: For theatre or music productions you will often want just the video image - not the audio. To mute the audio select Audio Device 'Mute Audio' as explained above. |
Video/Image File: Video File
This section describes the properties available for handling video files. For details of properties available for handling image files, see Still Images. For details of properties available for handling video capture, see Video Capture.
Video/Image File: This field is common to both videos and still images, and if the type of file selected here determines how the remainder of this section is displayed, ie for video or for still image. The field contains the name of the image file to be displayed. The ... (browse) button can be used to locate the required file. Most file formats are supported, including AVI, WMV, MPEG, MPG and MP4. Please contact us if you have a format that will not play. Note that the choice of Video Renderer may affect what can be played. (For still image formats, see Still Images.)
File Type: Summarized information about this file, including the width and height.
External editor: If you have selected an external Video Editor in Editing Options then SCS will call that Video Editor to enable you to edit the file. Note: when the external editor is called SCS will wait until it is closed before continuing. Upon closure of the external editor SCS will reload the file selected for editing.
File Length: The duration of the video file. (NB: times on video/image cues are only shown to 2 decimal places. Video frame rates are typically up to 30 frames per second, so millisecond timing is not particularly relevant.)
Start At and End At: If you do not want to start the cue from the beginning of the file, use the Start At field to the time at which the cue is to start. If you want SCS to stop the cue before the end of the file then set the End At field to the time at which you want the cue to stop. The 'End At' field is the absolute time within the file, not the required time after 'Start At'. Leave 'End At' blank to let the cue run until the end of the file (or until you stop it). For example, to get SCS to stop playing the cue at the 15.45 seconds time with the file enter 15.45 in the 'End At' field.
Play length: This field shows how much of the video file will be played, based on the 'Start At' and 'End At' times. The range of the progress slider below the preview image is set to this Play Length.
Relative Level (%): As with Playlist cues, this fader gives you a chance to adjust the audio level of an individual video file, making it louder or softer than the others. The default setting for this fader is 80%, so by default you have headroom available for increasing the level of a file.
xPos, yPos, Size, Aspect and Other: These controls enable you to adjust how the video image is displayed. See the description of these controls under Still Images for more information, including information on how to adjust the X/Y position and size using the mouse or keyboard. See also Using SCS Sliders for tips on resetting the sliders to their default values.
Transition to Next File: This defines how the cue is to transition from this file to the next file in the cue. Options are
•None: No 'transition' is required, and that when this file has completed the next file will start, with no cross-fade, etc.
•Cross Fade: This file will fade out and the next file will simultaneously fade in. The duration of the cross-fade is specified in the Transition Time field.
|
IMPORTANT NOTE: The Transition properties are used between items within the current Video/Image Sub-Cue only. They are NOT used to control the transition from the current cue or sub-cue to the next cue or sub-cue. If you want to cross-fade the last image in this cue or sub-cue to the first image in the next cue or sub-cue then you need to use the Sub-Cue Fade In Time of that next cue or sub-cue. Here are a couple of examples: Example 1: Q1 displays an image, and after 30 seconds you want a 2-second cross-fade to the image in Q2. •Set up Q1 with a display duration of 32 seconds. •Set up Q2 to auto-start 2 seconds before the end of Q1, and set Q2's fade in time to 2 seconds. Example 2: Q3 displays an image to be displayed continuously until Q4 (another image cue) is manually started. Q3 is then to cross-fade to Q4 over 5 seconds. •Set up Q3 with the 'continuous' checkbox selected. •Set up Q4 (manual start) with a sub-cue fade in time of 5 seconds. |
Audio Graph Controls
The audio graph will not be displayed if the file's duration is greater than the Editing Option Max. File Length for Audio Graph File Scan / Video Files.
|
Notes: •To display the graph SCS scans and decodes the audio of the video file, which can take several seconds for a large file. However, once the graph has been built SCS saves the graph information in a database in the same folder as your cue file (the .scs11 file) so the next time you view this audio file cue the graph will be displayed 'instantly'. •There are two major phases in assembling the data for the graph. The first phase is reading and decoding data from the audio file and populating an internal 'samples' array. While this phase is in progress a yellow progress bar will be displayed. The second phase is pulling data from the 'samples' array to populate an array that matches the graph's display width. While this phase is in progress a green progress bar will be displayed. •If the time taken to build these audio graphs is too long then you can suppress the audio graph completely by going to Editing Options and setting the 'Max. File Length for Audio Graph Scan' to 'Do not display audio graph' against the Video Files setting. •Video files that have more than 2 channels will have their audio graphs displayed as just two channels. The 'left' channel will be the sum of channels 1, 3, 5, etc, and the 'right' channel will be the sum of channels 2, 4, 6, etc. |
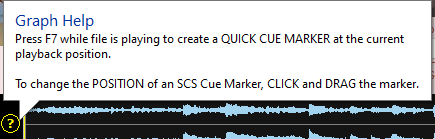
Moving or Changing an SCS Cue Marker
If you hover the mouse pointer over the question mark to the left of the graph, you will see this pop-up:
If you right-click on the audio graph a pop-up menu will be displayed giving you other options for handling cue markers.
Timeline
The timeline is shown the full width of the Editor window. If you change the width of the Editor window then the timeline will also be resized.
A thumbnail of each video and image file is shown in the timeline, plus a 'spare' for adding video/image files to the end of the timeline. The filename, excluding the file extension, is shown below the thumbnail, and also the Play Length (for videos) or Display Time (for images and video capture devices). Here is an example:

Clicking on a thumbnail in the timeline marks that as the currently-selected file, so the image and properties for that file are then displayed in the 'currently-selected file' area. A border is displayed around the thumbnail. You can also multi-select files by holding down Ctrl or Shift while you click the thumbnails, or press Ctrl+A to select all files. If you do select more than one file then no preview image will be displayed, and only fields common to all selected files will be displayed to the right of the preview panel. Where fields are displayed, any values in those fields will only be displayed if they are the same for all of the selected files.
If you click the 'spare' thumbnail at the end of the timeline, the file browser window is opened to enable you to select one of more video/image files to be added to the end of the timeline.
See also Drag and Drop for details on how files can be dragged from an external application.
Timeline Adjustment Controls
To change the order of the files in the timeline, use the left-arrow and right-arrow buttons below the timeline to move the selected file or files. (It is not yet possible to change the order of the files by drag-and-drop - that feature will be added later.) The 'plus' button allows you to insert one or more files immediately before the selected file, provided only one file is currently selected. The 'minus' button allows you to remove the selected file(s) from the cue (multiple files may be selected for this operation). The 'Rename' button allows you to rename the selected file, provided only one file is currently selected.
|
Testing your Video Cue You can test your Video Cue or Sub-Cue using the controls available in the 'Test' panel. Press the 'play' button to start the test. Other buttons enable you to go to the first, previous, next or last file. A tooltip is displayed when you hover the mouse over a button. Note that keyboard shortcuts are available for Play/Pause and Stop. The default shortcuts are F5 (Play/Pause) and F6 (Stop). Preview on Output Screen: If you select this checkbox then your video/image cue will display on the nominated screen. SCS remembers the setting of this checkbox during the current session, but deliberately does not save the setting across sessions. This is to avoid the possibility that you set this in your last editing session, then go into live production, and for some reason need to open the Editor during the live production. By not saving the setting across sessions this avoids the possibility of accidentally having your editor's video/image cue displayed on the main output screen when you have an audience present. Keyboard shortcuts are also available to Skip Back or Skip Forward 2 Seconds for each press of the keyboard shortcut. The default assignments are Shift+F8 (skip back) and Shift+F9 (skip forward). |